Cecaelia
New Member
- Joined
- Jul 20, 2017
- Messages
- 6
Oh boy, where do I start...
So I decided against my better judgment to make a lil pearl anklet for practice, using some cheapie pearls I bought off of ebay a while back. (http://m.ebay.com/itm/391709920558 these, to be exact. Not sure if they're actually biwa pearls or not, but I sure hope they are). That was my first mistake. Holy cow are these pearls SMALL!
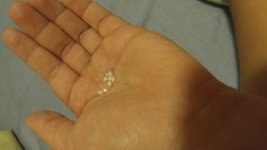
Well this should be fun. Regardless, I was eager to attempt this practice strand with what I already had at home, so I pulled out my trusty 50lb PARACHUTE CORD that I used for my gemstone beading projects, and began running into problems right away.
The fraying. Oh my god, the fraying. Turns out the parachute cord was barely thin enough to fit into the itty bitty pearl holes, single strand. Forget doubling up. The first couple pearls went on smoothly, but by the third the bitter end of the string was looking like an angry octopus. Wetting it with saliva barely helped -- if I tried to pass it through the drill hole even slightly off, smooosh. Angry octopus again. I had to cut off the darned thing. And that's when I came across another issue.
Cutting the cord is ridiculously hard!! DUH, it's 50lb parachute cord!! But even my sharpest sewing scissors couldn't make a clean cut. Nope, everything sawed throigh it slowly with ample fraying. I might as well have employed a rat to chew through it. I finally minimized the fraying by sharpening my sharpest folding knife and using that to cut the cord.
Just cutting the end off didn't stop the problems though -- it'd still fray after forcing it through a pearl! So I burned the end carefully to tidy up the fray, and dipped it in candle wax afterwards to stiffen the end and keep it tidy...and it worked! At least for a while. It wasn't exactly fray-proof so I'd have to saw, singe, and dip in wax several more times. I had the candle burning the entire time ; )
The knotting part is probably where I learned the most....Getting an overhand knot right up against the pearl is tricky! But I quickly learned that forming the knot around a thin needle, sliding it in place, then slipping the needle out of the knot worked like a charm. Since I mutilated my hand several times with a sewing needle, I quickly switched to the closest needle-like object, which is this beading thing with a pinhead, used for making dangly earrings and such.
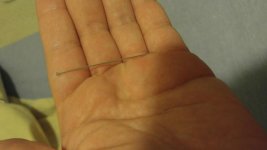
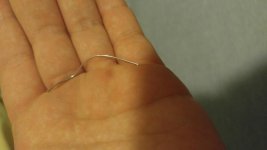
Apparently it couldn't stand the intense pressure of me trying to squeeze the knot as hard as I can, and wilted into this floppy noodle by the end of the anklet.
Anyways, for better or for worse, my first pearl knotting experience happened, and I got an anklet out of it (people won't look at it too closely anyways). Lesson I learned? Invest in the threads recommended by the pros, and for the love of God, get a threading needle!!!
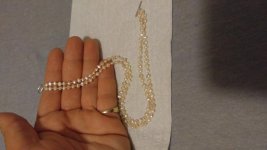
The end!
So I decided against my better judgment to make a lil pearl anklet for practice, using some cheapie pearls I bought off of ebay a while back. (http://m.ebay.com/itm/391709920558 these, to be exact. Not sure if they're actually biwa pearls or not, but I sure hope they are). That was my first mistake. Holy cow are these pearls SMALL!

Well this should be fun. Regardless, I was eager to attempt this practice strand with what I already had at home, so I pulled out my trusty 50lb PARACHUTE CORD that I used for my gemstone beading projects, and began running into problems right away.
The fraying. Oh my god, the fraying. Turns out the parachute cord was barely thin enough to fit into the itty bitty pearl holes, single strand. Forget doubling up. The first couple pearls went on smoothly, but by the third the bitter end of the string was looking like an angry octopus. Wetting it with saliva barely helped -- if I tried to pass it through the drill hole even slightly off, smooosh. Angry octopus again. I had to cut off the darned thing. And that's when I came across another issue.
Cutting the cord is ridiculously hard!! DUH, it's 50lb parachute cord!! But even my sharpest sewing scissors couldn't make a clean cut. Nope, everything sawed throigh it slowly with ample fraying. I might as well have employed a rat to chew through it. I finally minimized the fraying by sharpening my sharpest folding knife and using that to cut the cord.
Just cutting the end off didn't stop the problems though -- it'd still fray after forcing it through a pearl! So I burned the end carefully to tidy up the fray, and dipped it in candle wax afterwards to stiffen the end and keep it tidy...and it worked! At least for a while. It wasn't exactly fray-proof so I'd have to saw, singe, and dip in wax several more times. I had the candle burning the entire time ; )
The knotting part is probably where I learned the most....Getting an overhand knot right up against the pearl is tricky! But I quickly learned that forming the knot around a thin needle, sliding it in place, then slipping the needle out of the knot worked like a charm. Since I mutilated my hand several times with a sewing needle, I quickly switched to the closest needle-like object, which is this beading thing with a pinhead, used for making dangly earrings and such.

Apparently it couldn't stand the intense pressure of me trying to squeeze the knot as hard as I can, and wilted into this floppy noodle by the end of the anklet.

Anyways, for better or for worse, my first pearl knotting experience happened, and I got an anklet out of it (people won't look at it too closely anyways). Lesson I learned? Invest in the threads recommended by the pros, and for the love of God, get a threading needle!!!

The end!

