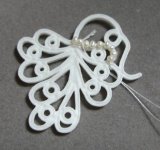
The process of creating the base has been surprisingly easy so far  I started with some very rough sketches of the pieces and traced over them in Inkscape (a free vector drawing program). I'm putting my notes on the technical processes in italics -- you can skip them if you don't want the boring details.
I used as many paths as I needed to get the curves. I just set the path down the center line of the piece and used stroke width to give it the necessary width. Surprisingly the process of converting it for my next step was easy -- after I had my curves right and stroke width scaled properly (so my 3cm piece would come out with 1mm lines) I used Path -> Stroke to Path to convert the stroke into paths in their own right, and Path -> Union to flatten the resulting mess of points. No further tweaking was required.
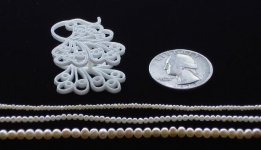
When I was done tracing in Inkscape I had this:

All nice and neat, and ready to be imported into Blender.
Blender is my 3D graphics program of choice, mostly because it is free. It's incredibly powerful and famous for a correspondingly steep learning curve I know just enough to get by, but to my further surprise the process in Blender wasn't too difficult either.
I used the Adobe Illustrator/PDF/SVG plugin in Blender to import the SVG file Inkscape created. It seems to work better than the standard one in the import menu. Not all SVGs import flawlessly, but this one did. When I imported it I set the smoothness to 3, which will probably vary depending on how many points you have in your SVG and your personal tastes in poly counts.
Once I had it imported and scaled to 3cm I extruded it to a height of 1.5mm.
I decided to add a bit of an indentation to it to help hold the pearls. I think this will save me a lot of frustration I've prepared this model for 3D printing, and I will wait to see how it comes out before creating any more 3D models. (Sticking them together with a sprue avoids additional handling fees. Printing costs on this model are $3 USD.)

I made the indentation by selecting all vertices of one side, subdividing them two or three times, and gradually shrinking the selection and moving it down the Z axis 0.1mm each time until I had an indentation of 0.4mm. This is not the right way to do it. There is a way to do a smoother indentation that I don't quite recall right now
After that I duplicated the object and applied a Mirror modifier to it. I set the mirrored object to be the original object, constrained it to the Z axis, and positioned the two pieces about 1 cm away from each other with flat sides in. I added a 2mm cylinder, to be safely within Shapeways' sprue rules, and used the Boolean modifier to glue the three together. It's probably not the ideal way to do it, as the Boolean modifier takes a LOT of time and makes messy meshes, but I was too tired to fiddle around with gluing vertices together.
The last thing I had to do before submitting to Shapeways was fix non-manifold vertices. I had a couple of places to fix, mostly because of my bizarre stairstep indenting. The topic is too big to get into here, but I got myself out of a tight spot (in a place that was a black mass of vertices) by selecting all non-manifold vertices, deselecting everything but the problem spot, and merging those vertices at the center.
This weekend I will order this piece and hope for the best. Prints usually take 1-2 weeks to get here, so I will have to occupy myself with tracing my other sketches. The larger leaf shape will be easy to scale up, but the round flowers will need Special Treatment in Blender to achieve that dual-level look.
I used as many paths as I needed to get the curves. I just set the path down the center line of the piece and used stroke width to give it the necessary width. Surprisingly the process of converting it for my next step was easy -- after I had my curves right and stroke width scaled properly (so my 3cm piece would come out with 1mm lines) I used Path -> Stroke to Path to convert the stroke into paths in their own right, and Path -> Union to flatten the resulting mess of points. No further tweaking was required.
When I was done tracing in Inkscape I had this:

All nice and neat, and ready to be imported into Blender.
Blender is my 3D graphics program of choice, mostly because it is free. It's incredibly powerful and famous for a correspondingly steep learning curve
I used the Adobe Illustrator/PDF/SVG plugin in Blender to import the SVG file Inkscape created. It seems to work better than the standard one in the import menu. Not all SVGs import flawlessly, but this one did. When I imported it I set the smoothness to 3, which will probably vary depending on how many points you have in your SVG and your personal tastes in poly counts.
Once I had it imported and scaled to 3cm I extruded it to a height of 1.5mm.
I decided to add a bit of an indentation to it to help hold the pearls. I think this will save me a lot of frustration

I made the indentation by selecting all vertices of one side, subdividing them two or three times, and gradually shrinking the selection and moving it down the Z axis 0.1mm each time until I had an indentation of 0.4mm. This is not the right way to do it. There is a way to do a smoother indentation that I don't quite recall right now
After that I duplicated the object and applied a Mirror modifier to it. I set the mirrored object to be the original object, constrained it to the Z axis, and positioned the two pieces about 1 cm away from each other with flat sides in. I added a 2mm cylinder, to be safely within Shapeways' sprue rules, and used the Boolean modifier to glue the three together. It's probably not the ideal way to do it, as the Boolean modifier takes a LOT of time and makes messy meshes, but I was too tired to fiddle around with gluing vertices together.
The last thing I had to do before submitting to Shapeways was fix non-manifold vertices. I had a couple of places to fix, mostly because of my bizarre stairstep indenting. The topic is too big to get into here, but I got myself out of a tight spot (in a place that was a black mass of vertices) by selecting all non-manifold vertices, deselecting everything but the problem spot, and merging those vertices at the center.
This weekend I will order this piece and hope for the best. Prints usually take 1-2 weeks to get here, so I will have to occupy myself with tracing my other sketches. The larger leaf shape will be easy to scale up, but the round flowers will need Special Treatment in Blender to achieve that dual-level look.

