You are using an out of date browser. It may not display this or other websites correctly.
You should upgrade or use an alternative browser.
You should upgrade or use an alternative browser.
Andrew's Photography & Pearls
- Thread starter Andrew M
- Start date
BWeaves
Well-known member
Droooooooooool!
amti
Community member
My heart skipped a beat when I saw your last photo! That photo really shows the beautiful colors of your mom's strand!
Andrew M
Member
Everyone! I can share the "special secret project," at last!! 
A little while ago (a few weeks), I got in touch with some folks at PP mostly hypothetically saying "I know PP is focused on awesome quality for affordable pearls, but just for curiosity's sake... What could PP do vs (the well known high end pearl company) given the truly same budget...?"
And, as the VIP page said (check it out if you haven't yet!), the kind folks at PP told me about a couple of special strands they had on hand. We got to chatting, and the end result was that I had the privilege of making a couple of photos for the VIP page of these strands.
Even my own photos don't really do justice compared to seeing them in person (which I can say I have!), and they are truly lovely.
That said...
I am going to make a "blog style" more "BTS" post about this project soon, for those who are interested in the thought process and what goes into doing these types of shots, but in the meantime, please enjoy a couple more final images (there were lots!):


Gemandpearlover
Member
Beautiful photos. I cannot wait for your future blog style posts and pictures.
86Corvettegirl
Well-known member
Gorgeous photos!! I love how you capture the luster!
BWeaves
Well-known member
Both the pearls and your photography are outstanding!!!
Simply adorned
New Member
Fabulous photos! Fabulous pearls! Very much looking forward to learning more about the process 
Andrew M
Member
I wanted to share a quick photo of Rocio, who is simply yet another amazing and graceful model I get to work with. For this shoot, she was wearing some pearls, but they were faux. For the next shoot of this time, we're going to use some white Hanadama pearls instead.
I just couldn't help it - faux or not, I had to share this portrait. Rocio just absolutely EMANATES class.

I just couldn't help it - faux or not, I had to share this portrait. Rocio just absolutely EMANATES class.

baby nurse
Member
- Joined
- Jun 17, 2013
- Messages
- 2,782
She is just beautiful!!
Andrew M
Member
Well, hey, I have a long awaited blog post for you all!
First and foremost, I wanted to thank the great folks at Pearl Paradise for even making this possible. Without them, there would be no pearl photos here, no blog post, anything!
Secondly, I wanted to thank all of you great folks here at P-G, for encouragement & somehow enjoying all these things.
In the future, I'll definitely write on things like doing better photos with more "normal" equipment (or none at all), but I thought that y'all might enjoy seeing the process that went into photographing these special pearls...
I knew that I wanted to have as many options available to me in terms of light modifiers, setups, etc. so I knew I would want my full broncolor lighting kit available to me.*More specifically, I started with the broncolor Scoro 3200S power pack, and from it I was using my Para 133 modifier – usually, a para would not be the first choice for a jewelry shot, but I thought the ring light effect might be interesting on something circular like a pearl.
Jewelry (especially pearls), is often photographed on white, so I took a piece of white foam board as a good place to start for my “table.” I didn’t even use the flash at first, as I wanted to see what the modeling light might give me.
Before I took my first shot, I set two lights: the para off to the left, and a P70 even further left and much higher. I wanted to mix the harsh specular light with the para light – to give the feeling of the pearls being out in the sun, but without being so harsh that they got washed out.
So, with not much more than making sure my exposure was correct, I took this first shot, which came straight out of the camera like so: (*Note*: I shot everything on a tripod. Occasionally, I changed my composition)
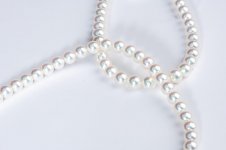
My first reaction was that I was on the right track, but not terribly overwhelmed at this point. I had a few issues with this image:
1. I knew I would have to use the flash. The modeling light made the pearls look a bit too yellow, and I was still picking up some ambient light from the room I was in. The pearls also looked dark – almost black on the side. These pearls are blindingly white with amazing luster, so I knew this was not the most flattering effect.
2. I thought the shadows that the pearls were casting was an interesting effect, but I knew that I didn’t want to and couldn’t have all my images with this shadow. Whenever I’m shooting for a company like Pearl Paradise, my foremost thought is providing lots of options, so I knew I would need to fill these shadows in somehow.
So, I decided to attack the shadow problem first, which would also help with the first. I simply put another piece of $5 white foam board off to the side to fill in some of the shadows and make the pearls brighten up a bit:
Definitely better! This improved the look.
I still had the issue of some shadows, though they were certainly improved.
I also remembered some photos of pearls that I had seen from other jewelry companies – typically, it was easy to see that pearls were shot with one large softbox, almost directly above. The soft light is good, but I wanted to give a different option.
I wanted to try mixing all three different types of light: soft (my reflector card to the side), medium/specular (the para on the left), and harsh. I needed a harsh source, so I dialed up the light on the side with the standard P70 reflector.
This didn’t actually didn’t help my shadow problem, no matter how high I got my light, but it did give me another interesting effect. The tops of the pearls were almost given a halo, and the harsh light with more juice in it really made the amazing, metallic luster of these pearls pop, and really forced out the orient (the soap bubble look). I knew that the folks at Pearl Paradise would like that. *At this point, I also decided to remove one of the strands so as to not over complicate things.
Knucklehead (me) got curious and thought “I wonder what a more textured background would look like!” and I didn’t have much on hand because Knucklehead left the important stuff elsewhere. All I really had was the tissue paper that the pearls came packed with, so I thought I’d give it a shot. I crumpled some up…

Yuck. It looked awful, and without forcing your poor eyes to look at more, no matter what I did the paper still looked waxy and unflattering, so away it went.
(There’s a good lesson in here: First, experiment! Second, everyone shoots junk; it’s just that normally only the final image gets seen. I am a professional photographer – an “expert,” though I would understand why the last image would lead you not to believe this… I have done tons of product shots, and I am still experimenting, and I still shoot junk.)
Back to the foam board I went.
I decided to move the P70 light around on the other side of the Para, lower it and still leave it on a high power (though I won’t lie, at this point the shadows were very much frustrating me and my friend George, who is another pro photographer helping me out with this).
Moving that P70 light made me realize something. Getting it more forward made the orient REALLY pop (woo!) and I actually didn’t mind the harsh point of light as much as I thought.
Positives...
This is also when I came to a realization about how I was filling the shadows in with my the foamboard – it wasn’t cutting it. Not enough filling power for what I needed, which was those shadows gone.
Enter light number 3, aka “Mr. Mongo.” Now, Mr. Mongo does not enjoy his name, but I have no other appropriate terms for the 6x4’ (yes, foot) softbox.
Essentially, I wanted the same effect as the foam reflector card, just with more oomph.
So, after wrestling Mr. Mongo onto a light stand, I took a shot:
You can immediately see the difference in reflection on the pearls. This window light was what I was looking for, but contrary to the problem I was actually trying to solve I actually now had a double shadow (lol) .
.
I had the shadow I was trying to get rid of (cast from the P70 behind me) and a new, softer shadow on the underside left of the pearls.
This one didn’t bother me so much, so now it was simply a decision of “A” or “B” for the shadows.
Time to feed the very hungry Mr. Mongo lots more light. – Huge softboxes eat light for breakfast (but fortunately the broncolor Scoro 3200S burns with the power of a thousand suns). So in a very well thought out professional decision of “NEEDS MORE POWAH” I pumped a lot more light through the big softbox:
Yeah! NOW we’re talkin’! – I got rid of the nasty harsh shadow, and all I had left was the softer, more subtle shadow on the other end, and this didn’t bother me.
Also, if you notice at this point, I’m still not actually doing anything with the pearls. They aren’t arranged in any special way. I just have them sitting out on the table. Pearl Paradise had told me that they wanted a specific, generic table shot, so that’s where I wanted to start; at the same time, Pearl Paradise has their own generic lighting setup for website photos, - and they don’t need me to do the same thing they can do for themselves, so I had to think of what I'd do differently.
Here, I’m pretty satisfied with both the placement, type, and power of my setup. I can always tweak later, but it’s important I am happy with how things are looking and the general direction for the rest of the shoot before I get crazy (George would tell me that I can’t “get” what I already am – touché.)
So, I have one final light related thing to do, to make sure I’m double, triple checking everything. It’s the same thing you do in a portrait to see what all your lights are contributing to the image, but this time the subject is pearls.
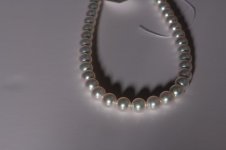
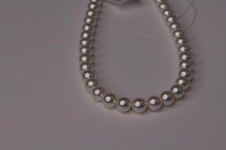
What I do is take a shot with only ONE light on at a time, until I have done a single shot with only one light, for all the lights in the setup, and then I will take a shot with them all together again.
Light 1 (Key) – this is now my large softbox, since it’s the most powerful and brightest contributor:
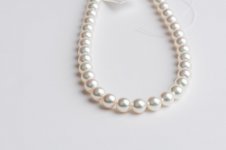
Light 2 (Fill) – This is the P70 reflector. Notice how both the main and fill contribute to removing the other’s harsh shadows:
Light 3 (technically, you could call this a backlight, but we’ll call it the cool accent light). Para133. Gives an interesting catchlight to the pearls
All 3 working together:
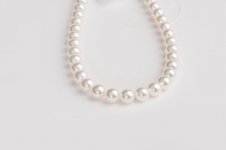
I was pretty satisfied with how this looked, so I knew at this point it was mostly just tweaking some color and artistically arranging the pearls to look interesting.
This is the easy shooting because now you can just play around, have fun, and see what else you can come up with!
I introduced the other strand again and arranged them in different ways, on top of each other, next to, etc. – Pearl Paradise was very generous in giving me loose guidelines for shooting, so it was a lot of fun to just play with things.
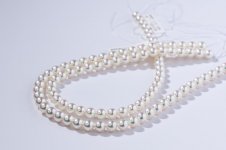
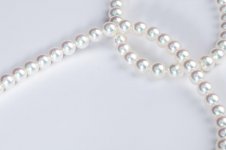
A medium detail shot, which lets customers see both the high quality detail & sharp, sharp luster, as well as an overview look:
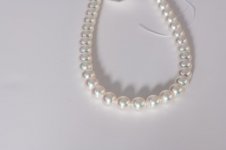
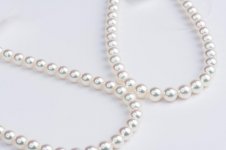
More generic but still interesting table-top style shot:
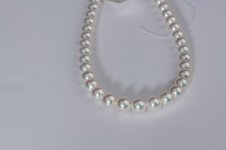
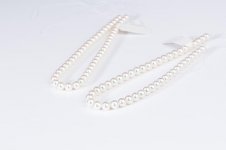
Pulled back tabletop:
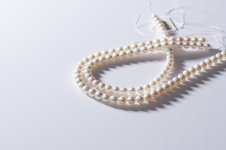
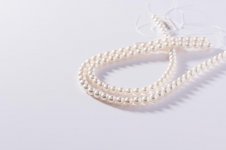
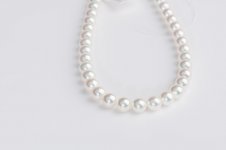
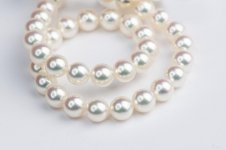
And, lastly, my most favorite image from the whole set… a hank, waiting to be strung, but in the meantime, all curled up together in beautiful symmetry, much like the amazing oysters who make the gems possible:
Thanks for reading, all.
This blog post is a copy from my website.
Looking forward to posting more photography stuff in the future.
First and foremost, I wanted to thank the great folks at Pearl Paradise for even making this possible.
Secondly, I wanted to thank all of you great folks here at P-G, for encouragement & somehow enjoying all these things.
In the future, I'll definitely write on things like doing better photos with more "normal" equipment (or none at all), but I thought that y'all might enjoy seeing the process that went into photographing these special pearls...
I knew that I wanted to have as many options available to me in terms of light modifiers, setups, etc. so I knew I would want my full broncolor lighting kit available to me.*More specifically, I started with the broncolor Scoro 3200S power pack, and from it I was using my Para 133 modifier – usually, a para would not be the first choice for a jewelry shot, but I thought the ring light effect might be interesting on something circular like a pearl.
Jewelry (especially pearls), is often photographed on white, so I took a piece of white foam board as a good place to start for my “table.” I didn’t even use the flash at first, as I wanted to see what the modeling light might give me.
Before I took my first shot, I set two lights: the para off to the left, and a P70 even further left and much higher. I wanted to mix the harsh specular light with the para light – to give the feeling of the pearls being out in the sun, but without being so harsh that they got washed out.
So, with not much more than making sure my exposure was correct, I took this first shot, which came straight out of the camera like so: (*Note*: I shot everything on a tripod. Occasionally, I changed my composition)

My first reaction was that I was on the right track, but not terribly overwhelmed at this point. I had a few issues with this image:
1. I knew I would have to use the flash. The modeling light made the pearls look a bit too yellow, and I was still picking up some ambient light from the room I was in. The pearls also looked dark – almost black on the side. These pearls are blindingly white with amazing luster, so I knew this was not the most flattering effect.
2. I thought the shadows that the pearls were casting was an interesting effect, but I knew that I didn’t want to and couldn’t have all my images with this shadow. Whenever I’m shooting for a company like Pearl Paradise, my foremost thought is providing lots of options, so I knew I would need to fill these shadows in somehow.
So, I decided to attack the shadow problem first, which would also help with the first. I simply put another piece of $5 white foam board off to the side to fill in some of the shadows and make the pearls brighten up a bit:

Definitely better! This improved the look.
I still had the issue of some shadows, though they were certainly improved.
I also remembered some photos of pearls that I had seen from other jewelry companies – typically, it was easy to see that pearls were shot with one large softbox, almost directly above. The soft light is good, but I wanted to give a different option.
I wanted to try mixing all three different types of light: soft (my reflector card to the side), medium/specular (the para on the left), and harsh. I needed a harsh source, so I dialed up the light on the side with the standard P70 reflector.

This didn’t actually didn’t help my shadow problem, no matter how high I got my light, but it did give me another interesting effect. The tops of the pearls were almost given a halo, and the harsh light with more juice in it really made the amazing, metallic luster of these pearls pop, and really forced out the orient (the soap bubble look). I knew that the folks at Pearl Paradise would like that. *At this point, I also decided to remove one of the strands so as to not over complicate things.
Knucklehead (me) got curious and thought “I wonder what a more textured background would look like!” and I didn’t have much on hand because Knucklehead left the important stuff elsewhere. All I really had was the tissue paper that the pearls came packed with, so I thought I’d give it a shot. I crumpled some up…

Yuck. It looked awful, and without forcing your poor eyes to look at more, no matter what I did the paper still looked waxy and unflattering, so away it went.
(There’s a good lesson in here: First, experiment! Second, everyone shoots junk; it’s just that normally only the final image gets seen. I am a professional photographer – an “expert,” though I would understand why the last image would lead you not to believe this… I have done tons of product shots, and I am still experimenting, and I still shoot junk.)
Back to the foam board I went.
I decided to move the P70 light around on the other side of the Para, lower it and still leave it on a high power (though I won’t lie, at this point the shadows were very much frustrating me and my friend George, who is another pro photographer helping me out with this).
Moving that P70 light made me realize something. Getting it more forward made the orient REALLY pop (woo!) and I actually didn’t mind the harsh point of light as much as I thought.
Positives...

This is also when I came to a realization about how I was filling the shadows in with my the foamboard – it wasn’t cutting it. Not enough filling power for what I needed, which was those shadows gone.
Enter light number 3, aka “Mr. Mongo.” Now, Mr. Mongo does not enjoy his name, but I have no other appropriate terms for the 6x4’ (yes, foot) softbox.
Essentially, I wanted the same effect as the foam reflector card, just with more oomph.
So, after wrestling Mr. Mongo onto a light stand, I took a shot:

You can immediately see the difference in reflection on the pearls. This window light was what I was looking for, but contrary to the problem I was actually trying to solve I actually now had a double shadow (lol)
I had the shadow I was trying to get rid of (cast from the P70 behind me) and a new, softer shadow on the underside left of the pearls.
This one didn’t bother me so much, so now it was simply a decision of “A” or “B” for the shadows.
Time to feed the very hungry Mr. Mongo lots more light. – Huge softboxes eat light for breakfast (but fortunately the broncolor Scoro 3200S burns with the power of a thousand suns). So in a very well thought out professional decision of “NEEDS MORE POWAH” I pumped a lot more light through the big softbox:

Yeah! NOW we’re talkin’! – I got rid of the nasty harsh shadow, and all I had left was the softer, more subtle shadow on the other end, and this didn’t bother me.
Also, if you notice at this point, I’m still not actually doing anything with the pearls. They aren’t arranged in any special way. I just have them sitting out on the table. Pearl Paradise had told me that they wanted a specific, generic table shot, so that’s where I wanted to start; at the same time, Pearl Paradise has their own generic lighting setup for website photos, - and they don’t need me to do the same thing they can do for themselves, so I had to think of what I'd do differently.
Here, I’m pretty satisfied with both the placement, type, and power of my setup. I can always tweak later, but it’s important I am happy with how things are looking and the general direction for the rest of the shoot before I get crazy (George would tell me that I can’t “get” what I already am – touché.)
So, I have one final light related thing to do, to make sure I’m double, triple checking everything. It’s the same thing you do in a portrait to see what all your lights are contributing to the image, but this time the subject is pearls.
What I do is take a shot with only ONE light on at a time, until I have done a single shot with only one light, for all the lights in the setup, and then I will take a shot with them all together again.
Light 1 (Key) – this is now my large softbox, since it’s the most powerful and brightest contributor:

Light 2 (Fill) – This is the P70 reflector. Notice how both the main and fill contribute to removing the other’s harsh shadows:

Light 3 (technically, you could call this a backlight, but we’ll call it the cool accent light). Para133. Gives an interesting catchlight to the pearls

All 3 working together:

I was pretty satisfied with how this looked, so I knew at this point it was mostly just tweaking some color and artistically arranging the pearls to look interesting.
This is the easy shooting because now you can just play around, have fun, and see what else you can come up with!
I introduced the other strand again and arranged them in different ways, on top of each other, next to, etc. – Pearl Paradise was very generous in giving me loose guidelines for shooting, so it was a lot of fun to just play with things.
A medium detail shot, which lets customers see both the high quality detail & sharp, sharp luster, as well as an overview look:

More generic but still interesting table-top style shot:

Pulled back tabletop:

And, lastly, my most favorite image from the whole set… a hank, waiting to be strung, but in the meantime, all curled up together in beautiful symmetry, much like the amazing oysters who make the gems possible:

Thanks for reading, all.
This blog post is a copy from my website.
Looking forward to posting more photography stuff in the future.
86Corvettegirl
Well-known member
Your talent & knowledge is shining through. I love looking at your photos & seeing you capture colors & luster!
sobellejanet
New Member
Andrew, this is a wonderful lesson in how to photograph pearls beautifully. I have tried dozens of times but never get anything close to this. Mainly because I don't have all the lighting resources you do as a professional. What settings do you use for aperture, shutter speed and focal length? Do you use a special lense? Anyhow, this post meant a lot to me as I am experimenting all the time (unsuccessfully) to get shots that accurately depict the luster and surface of the pearls.
Andrew M
Member
Sobellejanet, the lighting certainly helps, but actually with a little finagling these shots could have had something similar done with a window light.
I didn't use any particularly special lens - I used a 105mm macro lens, but again many options I could have done. I think most of these were taken at F/11 -- shutter speed irrelevant because they were studio images (I'm doing all my own light, so we don't need to worry about shutter speed)
The most important thing is probably a lens that lets you get close enough to focus and still fill the frame well enough and a big light source.
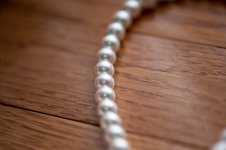
The photo posted previously in post #24 (the one on the woodgrain) was taken with only my camera and the pearls near our big kitchen window.
sobellejanet
New Member
Thanks, Andrew. I'll keep trying. Your studio shots of the ladies are dreamy.
Parrot Lady
Member
Andrew, now I understand why my photos are so awful. lol
CricketBug
New Member
- Joined
- Jan 11, 2014
- Messages
- 447
Loved seeing and learning the process to yield this, my fave shot! Thanks for the "tutorial".
View attachment 65523
Thanks for reading, all.
This blog post is a copy from my website.
Looking forward to posting more photography stuff in the future.
Similar threads
- Replies
- 6
- Views
- 3K
- Replies
- 5
- Views
- 940
